
Monday, September 27, 2010
Thursday, September 23, 2010
Zoom

The Cobra is my daughter’s dream car. I used copper, lockwashers, washers, watch parts, gears, charms, found objects, cottons, sheers, net, chenille, beads, sequins, and trims


Monday, September 20, 2010
Philadelphia MURAL inspirations
Wednesday, September 15, 2010
Columbus weekend highlights
Annual Balloonfest fun!
Deaf School Topiary Park had life size topiaries from Georges Seurat’s famous painting A Sunday Afternoon on the Isle of La Grand Jatte

Columbus Museum of Art


Tuesday, September 14, 2010
cyberhints
Artist's Watercolor Pencils: Vibrant pencils with a composition making them fully soluble in water. These pencils can be used dry like normal color pencils and then washed over with brush, or dipped in water to give a soft flow of color. The color of the ones put on wet are the brightest. The ones applied water to after they were laid down, ran.
Inktense Pencils - When used with water, the colors are the most vibrant of any other watercolor pencils. The colors are a bit more opaque than most, creating a true ink-like effect. Once dry, Inktense is permanent and cannot be lifted with water. This allows you to wash over your designs with other media and create spectacular effects.Inktense pencils are permanent when dry so can be used on fabric or they can have other mediums used over them without changing it. Watercolor pencils don't have this characteristic.
Make your own ink pads. Use a shallow plate or small aluminum tray. Cut two layers of felt the size of the pan or smaller Dampen the felt until it is absorbent and wring out. Add acrylic textile paint and mix well. Stamp as usual but clean off your stamps with soap and water as soon as you are finished. Allow printed image to dry and then heat set
.. use fabric paint or acrylic paint for stamping on fabric. Put some of the paint on a small sheet of plexiglass and roll it out thin with a rubber brayer. Depending on the size of the stamp and the consistency of the paint, you can carefully roll over the stamp with the paint-loaded brayer, or stamp into the paint on the plexi, pick it up and stamp on the fabric. Can also use a small, flat paintbrush, loaded, then pulled sideways across the stamp to "ink" the stamp. A foam brush uses more paint.
"Transfer eze": looks like a water soluble fabric you trace your design onto and then place over your stitching fabric. Then sew through it and wash away.
http://afewscraps.blogspot.com/ Free motion Quiltalong project
http://www.quiltfest.com/activities_detail.asp?id=124
http://clicks.robertgenn.com/jack-shadbolt.php
http://afewscraps.blogspot.com/2010/08/quilt-along-and-giveaway.html
http://bonniemccaffery.com/vidcasts/049.html
http://inaminuteago.com/stitchindex.html embroidery stitches
http://picasaweb.google.be/sommeke2002/Birmingham19082010# Festival of Quilts
http://www.modabakeshop.com/2010/05/fabric-fortune-cookies.html
http://hermajestymargo.blogspot.com/2010/08/shibori-borealis.html
http://www.kathyannewhite.com/textiles.html
http://www.reginabenson.com/installations.html
http://greatlakesaaquilters.tripod.com/2010QuiltShowFlyer_4.pdf
Inktense Pencils - When used with water, the colors are the most vibrant of any other watercolor pencils. The colors are a bit more opaque than most, creating a true ink-like effect. Once dry, Inktense is permanent and cannot be lifted with water. This allows you to wash over your designs with other media and create spectacular effects.Inktense pencils are permanent when dry so can be used on fabric or they can have other mediums used over them without changing it. Watercolor pencils don't have this characteristic.
Make your own ink pads. Use a shallow plate or small aluminum tray. Cut two layers of felt the size of the pan or smaller Dampen the felt until it is absorbent and wring out. Add acrylic textile paint and mix well. Stamp as usual but clean off your stamps with soap and water as soon as you are finished. Allow printed image to dry and then heat set
.. use fabric paint or acrylic paint for stamping on fabric. Put some of the paint on a small sheet of plexiglass and roll it out thin with a rubber brayer. Depending on the size of the stamp and the consistency of the paint, you can carefully roll over the stamp with the paint-loaded brayer, or stamp into the paint on the plexi, pick it up and stamp on the fabric. Can also use a small, flat paintbrush, loaded, then pulled sideways across the stamp to "ink" the stamp. A foam brush uses more paint.
"Transfer eze": looks like a water soluble fabric you trace your design onto and then place over your stitching fabric. Then sew through it and wash away.
http://afewscraps.blogspot.com/ Free motion Quiltalong project
http://www.quiltfest.com/activities_detail.asp?id=124
http://clicks.robertgenn.com/jack-shadbolt.php
http://afewscraps.blogspot.com/2010/08/quilt-along-and-giveaway.html
http://bonniemccaffery.com/vidcasts/049.html
http://inaminuteago.com/stitchindex.html embroidery stitches
http://picasaweb.google.be/sommeke2002/Birmingham19082010# Festival of Quilts
http://www.modabakeshop.com/2010/05/fabric-fortune-cookies.html
http://hermajestymargo.blogspot.com/2010/08/shibori-borealis.html
http://www.kathyannewhite.com/textiles.html
http://www.reginabenson.com/installations.html
http://greatlakesaaquilters.tripod.com/2010QuiltShowFlyer_4.pdf
Sunday, August 22, 2010
Cyberhints
No-Flo, a resist that coats fabric that allows you to paint with Dyna-flo to get painterly results and prevent the colors from running in the fabric. After being heat set, no-flow washes out. Dharma, Dick Blick carries it.
Tinting wool. Kool Aid was the method most suggested. black food coloring can be used to mute color.
Texture magic: works with the steam of an iron and even better with a heat gun. Great results with finer fabrics and close stitching.
Collage pieces mounted on canvas. Used gel medium to attach the pieces to the canvas, along with some dyed cheesecloth to 'take' the collage onto the background. http://daphnegreig.blogspot.com/
WONDERFUL thread: Signature thread and the big 5500 yd cones are only $1 each.... www.southernthread.com After you go there click on ebay store in the left-hand side panel... once in the ebay store, type in signature in the little search box on the left-hand side.
http://www.victorianaquiltdesigns.com/VictorianaQuilters/PatternPage/PatternPage.htm#
QuiltPatterns many many Quilt patterns
http://www.ctpubblog.com/2010/07/26/lois-jarvis-rusty-object-image-transfer-technique/
http://www.americanquilter.com/shows_contests/knoxville/2010/quilt_contest/quilt_winners.php?utm_source=delivra&utm_medium=email&utm_campaign=AQS%20On%20Point%20-%20Issue%2035
Blog2print : blogs printed into a book
http://blog2print.sharedbook.com/blogworld/printmyblog/index.html
http://www.unitednotions.com/MBS-casserole-carrier.pdf
http://www.allianceforamericanquilts.org/projects/galleries/New%20from%20Old/gallery/
http://www.murphys-laws.com/murphy/murphy-sewing.html
http://wwwbluemoonriver.blogspot.com/2010/07/framing-fiber-art.html
Tuesday Tessellation Tutorial Time
http://quiltspluscolor.blogspot.com/2010/06/tuesday-tessellation-tutorial-time.html
http://quiltspluscolor.blogspot.com/2010/07/tessellation-tutorial-lesson-2-woi.html
http://fiberartgoddess.blogspot.com/2010/07/collage-innovation.html
ATC exhibit for the Vernon Public Art Gallery in Canada - submit 6 ATC's and after the show, they will send you 6 ATC's from other artists:
http://vernonpublicartgallery.com/images/stories/forms/atc_call-new.pdf
http://www.americanquilter.com/shows_contests/knoxville/2010/quilt_contest/quilt_winners.php
http://www.thequiltshow.com/os/bernina_videos.php
Material Concepts: Tyvek in a tall, light-weight roll - it weighs about 4 lbs . http://www.materialconcepts.com/
http://www.quilttoursoflasvegas.com/tours.htm
http://freemotionquilting.blogspot.com/2010/01/break-your-foot.html
http://michigoose-life-quilts.blogspot.com/2010/08/aullwood-quilt-show-merry-havens-color.html
Tinting wool. Kool Aid was the method most suggested. black food coloring can be used to mute color.
Texture magic: works with the steam of an iron and even better with a heat gun. Great results with finer fabrics and close stitching.
Collage pieces mounted on canvas. Used gel medium to attach the pieces to the canvas, along with some dyed cheesecloth to 'take' the collage onto the background. http://daphnegreig.blogspot.com/
WONDERFUL thread: Signature thread and the big 5500 yd cones are only $1 each.... www.southernthread.com After you go there click on ebay store in the left-hand side panel... once in the ebay store, type in signature in the little search box on the left-hand side.
http://www.victorianaquiltdesigns.com/VictorianaQuilters/PatternPage/PatternPage.htm#
QuiltPatterns many many Quilt patterns
http://www.ctpubblog.com/2010/07/26/lois-jarvis-rusty-object-image-transfer-technique/
http://www.americanquilter.com/shows_contests/knoxville/2010/quilt_contest/quilt_winners.php?utm_source=delivra&utm_medium=email&utm_campaign=AQS%20On%20Point%20-%20Issue%2035
Blog2print : blogs printed into a book
http://blog2print.sharedbook.com/blogworld/printmyblog/index.html
http://www.unitednotions.com/MBS-casserole-carrier.pdf
http://www.allianceforamericanquilts.org/projects/galleries/New%20from%20Old/gallery/
http://www.murphys-laws.com/murphy/murphy-sewing.html
http://wwwbluemoonriver.blogspot.com/2010/07/framing-fiber-art.html
Tuesday Tessellation Tutorial Time
http://quiltspluscolor.blogspot.com/2010/06/tuesday-tessellation-tutorial-time.html
http://quiltspluscolor.blogspot.com/2010/07/tessellation-tutorial-lesson-2-woi.html
http://fiberartgoddess.blogspot.com/2010/07/collage-innovation.html
ATC exhibit for the Vernon Public Art Gallery in Canada - submit 6 ATC's and after the show, they will send you 6 ATC's from other artists:
http://vernonpublicartgallery.com/images/stories/forms/atc_call-new.pdf
http://www.americanquilter.com/shows_contests/knoxville/2010/quilt_contest/quilt_winners.php
http://www.thequiltshow.com/os/bernina_videos.php
Material Concepts: Tyvek in a tall, light-weight roll - it weighs about 4 lbs . http://www.materialconcepts.com/
http://www.quilttoursoflasvegas.com/tours.htm
http://freemotionquilting.blogspot.com/2010/01/break-your-foot.html
http://michigoose-life-quilts.blogspot.com/2010/08/aullwood-quilt-show-merry-havens-color.html
Saturday, August 14, 2010
Droid Cell Phone Cover from Fabric Postcards

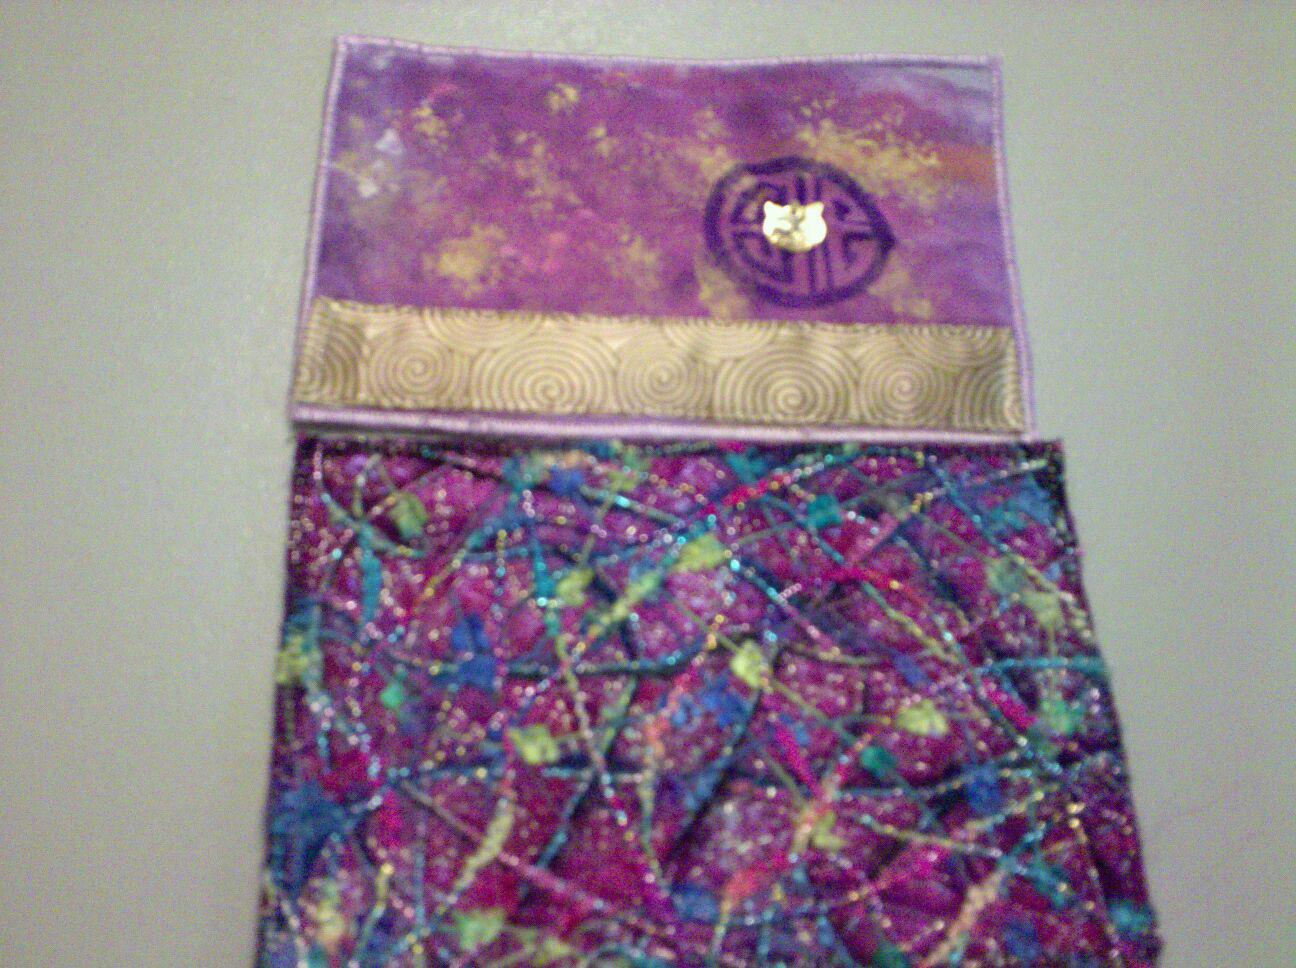
Made a Droid Cover from Fabric Postcards that I had swapped on the internet. Embellished the postcards with ribbons, yarns, a cat charm and added a velcro closure. Used watersoluble pastels on the inside of the cover so they are pink and purple on the non embellished side. They are the perfect size for the cell phone and should keep them without scratches in my daughter's purse!
Sunday, August 1, 2010

Evening Star Quilt Guild Trunk Show


I enjoyed sharing 5 suitcases of quilts with the Evening Star Quilt Guild Trunk Show in Davison, MI July 28. They are a friendly group of women..we all had a great time.
Caitlin and Allison's flowers


These are 12 year old Caitlin and Allison's 3D flowers. They used sheer rectangles for red flowers,circles for folded flowers, fused flowers, shisha mirrors and textured fabric for their projects.
Wednesday, July 7, 2010
Senior cell phone

Having gone from a Tracphone that I barely used to a Droid, I absolutely love this image a friend sent me. Am always trying to play catchup to advances in technology and spend hours trying to figure it all out....
Dubai fountain
This is an awesome video.
*To watch the fountain, click on the link below.
http://www.wimp.com/dubaifountain/
It was done by the same people who did the Bellagio Hotel in Vegas.
*When it starts, click the "full screen button" at the bottom right of
the "small screen" next to the time of the video (4 minutes).
*Then, just let it run. **Do NOT click on the word NEXT in the upper right of the picture square.
*Be patient and wait for the fountain to do its thing, and listen to the gorgeous duet performed by Andre Bocelli and Sarah Brightman
*To watch the fountain, click on the link below.
http://www.wimp.com/dubaifountain/
It was done by the same people who did the Bellagio Hotel in Vegas.
*When it starts, click the "full screen button" at the bottom right of
the "small screen" next to the time of the video (4 minutes).
*Then, just let it run. **Do NOT click on the word NEXT in the upper right of the picture square.
*Be patient and wait for the fountain to do its thing, and listen to the gorgeous duet performed by Andre Bocelli and Sarah Brightman
Sunday, July 4, 2010
Setacolors to paint quilts: If diluted by half, they don't change the hand of the fabric. If you use them full strength, they do become a bit stiff, and if you quilt through them full strength, you make holes in the paint when you quilt. Golden liquid acrylic paints go very far, they don't change the hand of the fabric at all, you don't make holes in it when you quilt, it's permanent.
The best fabric paint, in regards to changing the hand of the finished quilt the least, is Dye-Na-Flow by Jacquard. Part of the reason is that it is very close to the consistency of ink or dye. That means that you must learn to control its coverage; easily done through the use of resists or by thickening it with a product that will wash out once the finished image has been heat set, leaving behind the paint but not the thickener. Dye-Na-Flow can be applied quickly and dries in no time.
Embellishments: If you are using light applications of roving and other fabrics, and if there are "holes" where no roving shows, you can add some hot-fix crystals to add glitz.
14yds of fabric weighs slightly less than 5pounds
Masks for discharge: There is a difference between Organic Vapor masks, used for spray painting/petrochemical fumes, and Acid Gas cartridges, which is what you want for discharge. A link for masks and cartridges:
http://tinyurl.com/33xfofc (NAYY) . It was recommended by folks over on the DyersList - the masks come in small, medium and large sizes and have interchangeable cartridges. The dust filters are also color-coded - P95, which cuts 95% of particles out of the air, are yellow. P100 are hot pink. Typical disposable masks say P95 on them. And you can get combo filters - dust and acid gas together. And yes, keep the cartridges in zip loc bags. Pro Chemical's anti-chlor instructions, which mentions acid gas cartridges.
http://www.prochemical.com/directions/Discharge%20PDF/Antichlor.pdf
... Be sure to keep it sealed in a zip-loc bag when not in use, or the cartridges will keep filtering the surrounding air, and become exhausted very quickly.
.. the gas from chlorine bleach discharging is the same gas that injured the lungs of so many soldiers in world war one. Take it very seriously.
Aquadoodle marker (found with the crayons sold in Grocery stores/ Target/Walmart ): fill with water. Go over the water soluble crayolas that marked the quilted areas with the Aquadoodle pen and the marks wash right out. Be sure to test before using them on your quilt.
.. Try Aquarelle (watercolor) art pencils instead of Crayola's. http://www.thefind.com/family/info-aquarel-pencils
.
Green ink Uniball : used these on black and was able to see the markings.
Glide is this fabulous poly thread made by Fil Tec. It's so lustrous that it almost appears to be metallic, and it glides onto the fabric. I can't say enough good about it.
Executive Sunlight Desklamp from Walmart . FABULOUS sewing table light. $10. Illuminates the whole sewing table with a weighted base and adjustable angle for the arm. Lighting is 150 watts but only 27 fluorescent watts used.
Artist's quality acrylic paint WON'T fade if you look for the ASTM (American Society for Testing and Materials) label. If it conforms to ASTM1 (1–Pigments of excellent lightfastness) or ASTM2 (Pigments of very good lightfastness) the pigments are of archival quality and will remain true and vibrant for generations. Brands that guarantee their artist's paints include Chroma (Jo Sonja, Atellier), Matisse, Liquitex etc.
If you add a magnet to the bottom of the tin it serves double duty. It holds the pins in the tin and it acts as a magnet to pick up the spilled pins
***NEW VidCast #46 Fabric Embellishments -
Liz Kettle, Ruth Chandler and Heather Thomas sat down to talk about their
book "Fabric Embellishments" and share a few of the gorgeous and innovative techniques including ricing, glass beads and ribbon printing! http://www.bonniemccaffery.com
http://mairuru.blogspot.com/2010/02/how-to-make-origami-drawstring-bag.html from 2 squares, hanky, pillow panels
basting in about 3 minutes http://www.youtube.com/watch?v=bvx76JkxY7Y
http://www.adventurequilter.com/e-Learning/Articles/Squiggle.html
http://lindastamps.wordpress.com/2008/12/06/stampbusters-episode-5-the-dirt-on-stamp-cleaners/
tutorial on making shimmer mists using mica powders
http://techniqueszone.wordpress.com/2010/04/13/diy-powdered-mica-spritzer-backgrounds/
http://bonniemccaffery.com/vidcasts/index.html
"sketchbook" project: Sounds like a great project to participate in.
http://arthousecoop.com/projects/sketchbookproject
Sharon B's Dictionary of Stitches for Hand Embroidery and Needlework
http://inaminuteago.com/stitchindex.html
http://www.flickr.com/photos/maggieart/
http://fibreartnetwork.com/exhibitions/GeoPhysical/19
http://fibreartnetwork.com/exhibitions/EdgingForward/14
http://ideas-of-inspiration.blogspot.com/
http://www.wiquiltmuseum.com/
http://www.needlenthread.com/videos
http://www.wellingtonarts.ca/wcm/documents/wcm/Threadwork2010CAT.pdf
You can watch full episodes of the new Art reality TV show , Work of Art here: http://www.bravotv.com/full-episodes
http://quiltersguildnsw.com/quiltshow/
http://www.byannie.com/shop/category/patterns/texture-magic-1/
http://janeville.blogspot.com/2010/06/1.html needlefelting
http://dianatrout.blogspot.com/2010/06/sumi-smoosh-tutorial.html inks
preserving fiber: http://www.lacativa.com/hold10/demo/
http://www.gericondesigns.com/weblog/?p=6328
http://www.quiltart.com/15/
The best fabric paint, in regards to changing the hand of the finished quilt the least, is Dye-Na-Flow by Jacquard. Part of the reason is that it is very close to the consistency of ink or dye. That means that you must learn to control its coverage; easily done through the use of resists or by thickening it with a product that will wash out once the finished image has been heat set, leaving behind the paint but not the thickener. Dye-Na-Flow can be applied quickly and dries in no time.
Embellishments: If you are using light applications of roving and other fabrics, and if there are "holes" where no roving shows, you can add some hot-fix crystals to add glitz.
14yds of fabric weighs slightly less than 5pounds
Masks for discharge: There is a difference between Organic Vapor masks, used for spray painting/petrochemical fumes, and Acid Gas cartridges, which is what you want for discharge. A link for masks and cartridges:
http://www.prochemical.com/directions/Discharge%20PDF/Antichlor.pdf
... Be sure to keep it sealed in a zip-loc bag when not in use, or the cartridges will keep filtering the surrounding air, and become exhausted very quickly.
.. the gas from chlorine bleach discharging is the same gas that injured the lungs of so many soldiers in world war one. Take it very seriously.
Aquadoodle marker (found with the crayons sold in Grocery stores/ Target/Walmart ): fill with water. Go over the water soluble crayolas that marked the quilted areas with the Aquadoodle pen and the marks wash right out. Be sure to test before using them on your quilt.
.. Try Aquarelle (watercolor) art pencils instead of Crayola's. http://www.thefind.com/family/info-aquarel-pencils
.
Green ink Uniball : used these on black and was able to see the markings.
Glide is this fabulous poly thread made by Fil Tec. It's so lustrous that it almost appears to be metallic, and it glides onto the fabric. I can't say enough good about it.
Executive Sunlight Desklamp from Walmart . FABULOUS sewing table light. $10. Illuminates the whole sewing table with a weighted base and adjustable angle for the arm. Lighting is 150 watts but only 27 fluorescent watts used.
Artist's quality acrylic paint WON'T fade if you look for the ASTM (American Society for Testing and Materials) label. If it conforms to ASTM1 (1–Pigments of excellent lightfastness) or ASTM2 (Pigments of very good lightfastness) the pigments are of archival quality and will remain true and vibrant for generations. Brands that guarantee their artist's paints include Chroma (Jo Sonja, Atellier), Matisse, Liquitex etc.
If you add a magnet to the bottom of the tin it serves double duty. It holds the pins in the tin and it acts as a magnet to pick up the spilled pins
***NEW VidCast #46 Fabric Embellishments -
Liz Kettle, Ruth Chandler and Heather Thomas sat down to talk about their
book "Fabric Embellishments" and share a few of the gorgeous and innovative techniques including ricing, glass beads and ribbon printing! http://www.bonniemccaffery.com
http://mairuru.blogspot.com/2010/02/how-to-make-origami-drawstring-bag.html from 2 squares, hanky, pillow panels
basting in about 3 minutes http://www.youtube.com/watch?v=bvx76JkxY7Y
http://www.adventurequilter.com/e-Learning/Articles/Squiggle.html
http://lindastamps.wordpress.com/2008/12/06/stampbusters-episode-5-the-dirt-on-stamp-cleaners/
tutorial on making shimmer mists using mica powders
http://techniqueszone.wordpress.com/2010/04/13/diy-powdered-mica-spritzer-backgrounds/
http://bonniemccaffery.com/vidcasts/index.html
"sketchbook" project: Sounds like a great project to participate in.
http://arthousecoop.com/projects/sketchbookproject
Sharon B's Dictionary of Stitches for Hand Embroidery and Needlework
http://inaminuteago.com/stitchindex.html
http://www.flickr.com/photos/maggieart/
http://fibreartnetwork.com/exhibitions/GeoPhysical/19
http://fibreartnetwork.com/exhibitions/EdgingForward/14
http://ideas-of-inspiration.blogspot.com/
http://www.wiquiltmuseum.com/
http://www.needlenthread.com/videos
http://www.wellingtonarts.ca/wcm/documents/wcm/Threadwork2010CAT.pdf
You can watch full episodes of the new Art reality TV show , Work of Art here: http://www.bravotv.com/full-episodes
http://quiltersguildnsw.com/quiltshow/
http://www.byannie.com/shop/category/patterns/texture-magic-1/
http://janeville.blogspot.com/2010/06/1.html needlefelting
http://dianatrout.blogspot.com/2010/06/sumi-smoosh-tutorial.html inks
preserving fiber: http://www.lacativa.com/hold10/demo/
http://www.gericondesigns.com/weblog/?p=6328
http://www.quiltart.com/15/
Friday, July 2, 2010
Minneapolis Trip
Sucheta and Sunil showered us with warm Indian hospitality during our trip to Minnepolis. At Sneha’s graduation party, we met some wonderful people including Reshma and Manoj who had us over for a wonderful dinner.
My gift to Sneha was a graduation pillow. I started with a Ginko Colorwheel. To the center, I added a kaleidoscope of her photo in Kaleidoscope Creator 2 and then printed it on fabric. I also printed vital stats on a transparancy via the inkjet printer. I then cut the text apart and sewed it onto the Gingko leaves. I added a clarinet tie to the side of the pillow and added her favorite quote to the back.


The Minneapolis Institute of Arts was fun.


The Mall of America had a great bead shop..we were looking for beads and crystals for a peacock’s eyes and feathers for our quilt. The quilt was a duplicate of one we had started last year. We added dots in the feathers for highlights. We worked together to finish the quilt during this visit and it just sparkled!
The Minneapolis Sculpture Garden had a Conservatory with a huge glass fish along with many plants and trees. The giant Spoonbridge and Cherry sculpture with a spray of water created a colorful rainbow. It was a wonderful walk on a picture perfect day.
My gift to Sneha was a graduation pillow. I started with a Ginko Colorwheel. To the center, I added a kaleidoscope of her photo in Kaleidoscope Creator 2 and then printed it on fabric. I also printed vital stats on a transparancy via the inkjet printer. I then cut the text apart and sewed it onto the Gingko leaves. I added a clarinet tie to the side of the pillow and added her favorite quote to the back.


The Minneapolis Institute of Arts was fun.


The Mall of America had a great bead shop..we were looking for beads and crystals for a peacock’s eyes and feathers for our quilt. The quilt was a duplicate of one we had started last year. We added dots in the feathers for highlights. We worked together to finish the quilt during this visit and it just sparkled!
The Minneapolis Sculpture Garden had a Conservatory with a huge glass fish along with many plants and trees. The giant Spoonbridge and Cherry sculpture with a spray of water created a colorful rainbow. It was a wonderful walk on a picture perfect day.
Monday, June 14, 2010
Detroit River Cruise
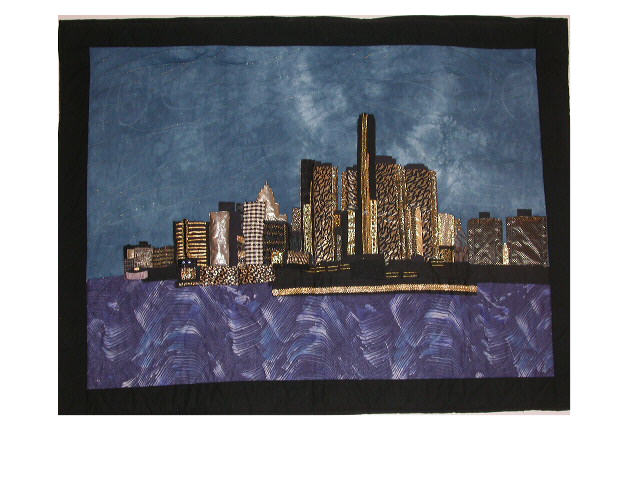

Enjoyed a Detroit River Cruise with my mom, her friends and the Gujarati Samaj on a picture perfect day. Loved seeing the wonderful Deroit and Windsor skylines, Belle Isle, and even Boblo..brought back memories of the amusement park.
Seeing the skyline also brought back memories of working with my daughter, Lisa on the Detroit skyline quilt, Detroit Motown Sundown when she was sixteen. She created it as a summer project, working on a new building every day.
Tuesday, June 8, 2010
Celebrate Bollywood Concert with the Plymouth Symphony


Attended a Bollywood Concert at the at The Village Theater that included Nan Washburn conducting the Plymouth Canton Symphony orchestra and Indian percussionists and outstanding vocalists including Rujuta Joshi and Amol Khanapurkar. Narendra Sheth, the Indian Radio Show Host of Geetmala gave a talk prior to the concert and played the harmonium and harmonica as well.
The concept of playback singers is one of the ideas in the Bollywood Music quilt I made a few years ago where the actors lip sync to the playback singers. Lata Mangeshkar has sung over 35,000 songs in her career.
The melodious Hindi music was just outstanding. The Symphony and the Indian musicians sounded so good together!
Wednesday, June 2, 2010
Infectious Smiles

The quilt is a result of two different challenges..one for Flower Children for the Fast Friday Online group and the other for My Favorite Things for the Creative Seasons Art Quilt group.
My girls bring me Crazy Daisies, and say these are “I am glad you are not dead flowers”..so each girls has a bouquet of flowers in her hands.
My Favorite Things are my daughters’ infectious smiles. The figures can be dolls and separated from the quilt and are of my daughters, Lisa and Amy. Lisa’s heart is her new cat, Athena. Lisa’s portrait says I Love Chocolate when you press her body! One of her hands says she was Born to Shop...sales and prices are not that important to her.
Amy’s new home is in Washington DC and her arms are made from a tote bag. The illegal money her firm tracks is her skirt border. Her skirt fabric is from a tie ...Las Vegas is her favorite destination . She is a musician. Her guitar, cut from the Cricut, is right next to her. She thinks she should have as many guitars as I do sewing machines. The back of the doll portraits have huge smiley faces. When my girls spread their infectious smiles, they are so much fun.
18”x22”
Danielle’s Kaleidoscope Pillow

Danielle’s Kaleidoscope Pillow
Life is Good and music notes were cut with the Cricut Expression and fused to the base.
Faces were individually cropped from a family photograph in Photoshop. Single images in Kaleidoscope Kreator 2 created various Kaleisocopes. They were then printed on fabric and machine quilted.
22”x22”
Friday, May 28, 2010
Art trip from Ann Arbor to Lansing


Sherry and I spent a fun, inspiring day on an art journey from Ann Arbor to Lansing!
Motawi Tileworks 170 Enterprise Dr, Ann Arbor, MI 48103 (734) 213-0017 www.ArtsAndCraftsTile.com. They have Tours Thursdays at 11am
USArtQuest ’s Susan Pickering Rothamel, inspired us with great demos in mixed media. She will be at the Ann Arbor Quilt Show Sat-Sun, July 30 - August 1, 2010
Ann Arbor, Michigan .Her store is at 7800 Ann Arbor Road, Grass Lake, MI 49240 Phone: 1-800-766-0728 http://www.usartquest.com/
Delphi Glass 3380 East Jolly Road Lansing, MI 48910 (517) 394-4685 delphiglass.com
Enjoyed the colorful glass mosaic car at the colorful entrance of the store, and bought glass scraps by the pound for my mosaics. Sherry picked up her wonderful fiber and glass quilts which were exhibited there recently.
Tuesday, May 4, 2010
Cyberhints
Cyber Hints:
Needlefelting: Do not move the fabric while the needles are down into the fabric. Move the needles faster than you do the fabric. Move slowly when going through thick layers.
Voice Quilt: Invite family and friends to call a toll-free number during a certain time period and leave a message for the milestone celebrant. They should share a special memory or talk about what the celebrant, eg my husband means to them, rather than to have 14 people sing Happy Birthday off-key. The Voice Quilt company sent an e-mail to me ever time someone recorded a message, so I could keep track, then organize the messages at the end in a sort of playlist, with an introduction and ending that I recorded myself. The Voice Quilt comes in a beautiful wooden box (of your choice), and like a music box, begins to play when opened. What a magical moment! The whole family sat rapt for 25 minutes, even the kids, while listening to the whole Voice Quilt and I had to go bring in the Kleenex box. My husband said it was the best gift he ever got in his whole life.
I hasten to add that I have no connection to this company whatsoever, and that they have an A rating with the Better Business Bureau. www.voicequilt.com. Meg Cox www.megcox.com
"Technique of the Week" http://blog.muppin.com
Fiberart International 2010 through August 22, 2010. Awesome Fiberart show in 2 locations: Society for Contemporary Crafts http://www.contemporarycraft.org) Pittsburgh Center for the Arts http://www.pittsburgharts.org)
http://www.flickr.com/photos/craftirn/page7/
wood quilts: www.gofraser.com/photos.htm
http://www.fabricfreedom.co.uk/QuiltsAndProjects.html
http://www.quiltwow.com/exhibs/dec2007/exhibs.htm
http://www.facebook.com/NizhoniStudios
http://steelscraps.blogspot.com/2010/01/rag-rug-using-2-squares.html
http://www.youtube.com/watch?v=fnOJyZQkrwA&feature=player_embedded
http://www.bryerpatch.com/gallery/2010quilts.htm
COFFEE FILTERS: Better than paper towels and a lot less expensive
Buy 1,000 at the Dollar Tree for almost nothing even the large ones.
1. Cover bowls or dishes when cooking in the microwave. Coffee filters make excellent covers.
2. Clean windows, mirrors, and chrome... Coffee filters are lint-free so they'll leave windows sparkling.
3. Protect China by separating your good dishes with a coffee filter between each dish.
4. Filter broken cork from wine. If you break the cork when opening a wine bottle, filter the wine through a coffee filter.
5.. Protect a cast-iron skillet. Place a coffee filter in the skillet to absorb moisture and prevent rust.
6. Apply shoe polish. Ball up a lint-free coffee filter.
7. Recycle frying oil. After frying, strain oil through a sieve lined with a coffee filter.
8. Weigh chopped foods. Place chopped ingredients in a coffee filter on a kitchen scale.
9. Hold tacos.. Coffee filters make convenient wrappers for messy foods.
10. Stop the soil from leaking out of a plant pot. Line a plant pot with a coffee filter to prevent the soil from going through the drainage holes.
11.. Prevent a Popsicle from dripping. Poke one or two holes as needed in a coffee filter.
12. Do you think we used expensive strips to wax eyebrows? Use strips of coffee filters..
13. Put a few in a plate and put your fried bacon, French fries, chicken fingers, etc on them. It soaks out all the grease.
14. Keep in the bathroom. They make great "razor nick fixers."
15. As a sewing backing. Use a filter as an easy-to-tear backing for embroidering or appliqueing soft fabrics.
16. Put baking soda into a coffee filter and insert into shoes or a closet to absorb or prevent odors.
17. Use them to strain soup stock and to tie fresh herbs in to put in soups and stews.
18. Use a coffee filter to prevent spilling when you add fluids to your car.
19. Use them as a spoon rest while cooking and clean up small counter spills.
20. Can use to hold dry ingredients when baking or when cutting a piece of fruit or veggies.. Saves on having extra bowls to wash.
21. Use them to wrap Christmas ornaments for storage.
22. Use them to remove fingernail polish when out of cotton balls.
23. Use them to sprout seeds.. Simply dampen the coffee filter, place seeds inside, fold it and place it into a plastic baggie until they sprout.
24. Use coffee filters as blotting paper for pressed flowers.. Place the flowers between two coffee filters and put the coffee filters in phone book..
25. Use as a disposable "snack bowl" for popcorn, chips, etc.
Children projects suggested on the Quiltart list:
A make-it-and-take-it tie dye booth. All the dyes are made up ahead, work with each child to fold, pleat, etc. their shirt, add rubber bands (I use colored ones as an addition to color code whose shirt is whose, red for one, blue for another, red and blue for a third, etc.), soak for 15-20 min. in soda ash (long enough to play I spy or another art game) then put on color with squeeze bottles. I provide gloves and lend an apron. Each shirt is put in a gallon zipper bag to be taken home and washed several times the next day.
Kids also love designing shirts or pillowcases with the iron-on fabric crayons. Have them draw their design in thin paper, then use the crayons to color & outline on the BACK side of the paper. Teacher does all the ironing as each student finishes. Put old newspapers inside the shirt to keep the color from bleeding.
You can print on fabric with leaves or clean styrofoam meat trays with designs drawn into them with a blunt pencil or ball point pen (again, work backwards).If you use a light colored bandanna to print on, it is already hemmed!
You can also make a loom from a piece of stiff cardboard. Cut slits about a half inch apart on opposite sides to warp it.
Coffee filters and food coloring mixed with water is another idea. Bunch up the round coffee filters into fan shape (little finger in the middle, gather the rest around the edges, twist a pipe cleaner around the pointed center. Dip the filters into a saucer with colored water and you have lovely carnations (idea from the Internet).
Wrap pipe cleaners around pencils
Art classes to 5-12 year olds. Keep it fun. Don't avoid messy. Ask each kid to bring in an old oversized shirt for their smock and have them paint it/decorate it and keep it after the class series end. You might consider going to a thrift shop and buy some extra shirts in case a kid doesn't have one.
My local Arts & Humanities council has two "art academies" every year for the same age group, runs 5-6 consecutive Saturdays. It also provides scholarships for those who can't afford the classes. I donate money for these scholarships. At the conclusion, a showing and a 1? hour reception is held in the lobby of the auditorium. The parents, guardians, or aunts & uncles are asked to bring their artist for punch and cookies to see the childrens' Art. The paintings have been hung on screens and the pottery and other projects are displayed on tables. Lively music is also provided gratis by a local group.Talk to as many artists about their work. Their reaction is interesting because a stranger is taking an interest in them, their artwork and why they made it.
Sculpting is fun, with clay if you can fire it, or sculptey if you need to bake in the oven. The middle school art teacher here teaches some advanced art students (8th grade) stained glass. If these 13/14 yr olds can learn to respect all the danger involved with it, imagine what your kids can do. In some respects, I think kids will step up when they know they need to.I don't think it's out of line for kids to use an iron as long as you explain the dangers involved and supervise. I also think older kids can help younger ones.
They also do an abstract sculpture using heavy wire and attached to a base, then pull pantyhose over it and secure that then coat the whole thing in glue. Let it dry and paint it with acrylics. They go on to write how the piece makes them feel.
Something many have forgotten is how much fun making a picture with yarn and burlap was. Get a few tapestry needles (even plastic ones will work) and let them try embroidering on a big, simple scale.
Use old jars and enamel paint(the bottles have an E on the top) and making candle holders, or put wires on them and hang them in tress for the summer.. or decorate wine glasses for their parents. Go to the thrift stores for the glasses or fancy glass globes.
Take some fat quarters and start the rip for them. Let them finish the rip in 1 inch strips. Knot or gather one end of the strips together around a dowel, and they have a flag or banner they can run through the yard with, letting the fabric streamers float along behind.
Mod Podge fabric shapes onto mat board to create a picture. I taught fabric portraits using that technique in a two-hour class for 6-12 year-olds. With that extra hour, I had time for them to trace key elements of a picture they brought in (and we sized on the copier to fill the 8 x 10 mat), then cut them out, trace around fabric, cut it out arrange, etc They glued down the fabric initially with glue sticks and then we applied 2 coats of mod podge, leaving about 5-10 minutes in between the coats.
You could precut shapes and do a little abstract in just an hour. Use those 1" foam brushes to apply the mod podge. Bring a large supply of fabric, lots of different skin colors and fun prints for clothes. They learned a ton and produced amazing portraits.
Some mat board will bend when it gets wet from the mod podge; as it dries, it lies flat again.
Dip the ends of yarn in stiffener to make "needles" and teach needlepoint on rug canvas. Dip the night before to allow it to dry - or wrap the yarn in wide tape and trim it to make a point.
Simple kumihimo on the foam discs is possible. Braiding floss to make friendship bracelets is popular.
Punched cards or fun felt can make lacing projects possible. The cards could be decorated with paints. The fun felt can be decorated with glued embellishments.
Sun printing is a project that would take an hour but you have to have another project planned for the "waiting" to dry time.
Make a loom out of a flexible limb - tie the two ends together to make a loop or circle. Add limbs and tie them across the loop or circle. You might have to do these ahead of time. Then teach them over and under and around and around to make a sort of earth day dream catcher.
With this age group, you have to be ready for them to invent something completely new and embrace it as alternative art.
Needlefelting: Do not move the fabric while the needles are down into the fabric. Move the needles faster than you do the fabric. Move slowly when going through thick layers.
Voice Quilt: Invite family and friends to call a toll-free number during a certain time period and leave a message for the milestone celebrant. They should share a special memory or talk about what the celebrant, eg my husband means to them, rather than to have 14 people sing Happy Birthday off-key. The Voice Quilt company sent an e-mail to me ever time someone recorded a message, so I could keep track, then organize the messages at the end in a sort of playlist, with an introduction and ending that I recorded myself. The Voice Quilt comes in a beautiful wooden box (of your choice), and like a music box, begins to play when opened. What a magical moment! The whole family sat rapt for 25 minutes, even the kids, while listening to the whole Voice Quilt and I had to go bring in the Kleenex box. My husband said it was the best gift he ever got in his whole life.
I hasten to add that I have no connection to this company whatsoever, and that they have an A rating with the Better Business Bureau. www.voicequilt.com. Meg Cox www.megcox.com
"Technique of the Week" http://blog.muppin.com
Fiberart International 2010 through August 22, 2010. Awesome Fiberart show in 2 locations: Society for Contemporary Crafts http://www.contemporarycraft.org) Pittsburgh Center for the Arts http://www.pittsburgharts.org)
http://www.flickr.com/photos/craftirn/page7/
wood quilts: www.gofraser.com/photos.htm
http://www.fabricfreedom.co.uk/QuiltsAndProjects.html
http://www.quiltwow.com/exhibs/dec2007/exhibs.htm
http://www.facebook.com/NizhoniStudios
http://steelscraps.blogspot.com/2010/01/rag-rug-using-2-squares.html
http://www.youtube.com/watch?v=fnOJyZQkrwA&feature=player_embedded
http://www.bryerpatch.com/gallery/2010quilts.htm
COFFEE FILTERS: Better than paper towels and a lot less expensive
Buy 1,000 at the Dollar Tree for almost nothing even the large ones.
1. Cover bowls or dishes when cooking in the microwave. Coffee filters make excellent covers.
2. Clean windows, mirrors, and chrome... Coffee filters are lint-free so they'll leave windows sparkling.
3. Protect China by separating your good dishes with a coffee filter between each dish.
4. Filter broken cork from wine. If you break the cork when opening a wine bottle, filter the wine through a coffee filter.
5.. Protect a cast-iron skillet. Place a coffee filter in the skillet to absorb moisture and prevent rust.
6. Apply shoe polish. Ball up a lint-free coffee filter.
7. Recycle frying oil. After frying, strain oil through a sieve lined with a coffee filter.
8. Weigh chopped foods. Place chopped ingredients in a coffee filter on a kitchen scale.
9. Hold tacos.. Coffee filters make convenient wrappers for messy foods.
10. Stop the soil from leaking out of a plant pot. Line a plant pot with a coffee filter to prevent the soil from going through the drainage holes.
11.. Prevent a Popsicle from dripping. Poke one or two holes as needed in a coffee filter.
12. Do you think we used expensive strips to wax eyebrows? Use strips of coffee filters..
13. Put a few in a plate and put your fried bacon, French fries, chicken fingers, etc on them. It soaks out all the grease.
14. Keep in the bathroom. They make great "razor nick fixers."
15. As a sewing backing. Use a filter as an easy-to-tear backing for embroidering or appliqueing soft fabrics.
16. Put baking soda into a coffee filter and insert into shoes or a closet to absorb or prevent odors.
17. Use them to strain soup stock and to tie fresh herbs in to put in soups and stews.
18. Use a coffee filter to prevent spilling when you add fluids to your car.
19. Use them as a spoon rest while cooking and clean up small counter spills.
20. Can use to hold dry ingredients when baking or when cutting a piece of fruit or veggies.. Saves on having extra bowls to wash.
21. Use them to wrap Christmas ornaments for storage.
22. Use them to remove fingernail polish when out of cotton balls.
23. Use them to sprout seeds.. Simply dampen the coffee filter, place seeds inside, fold it and place it into a plastic baggie until they sprout.
24. Use coffee filters as blotting paper for pressed flowers.. Place the flowers between two coffee filters and put the coffee filters in phone book..
25. Use as a disposable "snack bowl" for popcorn, chips, etc.
Children projects suggested on the Quiltart list:
A make-it-and-take-it tie dye booth. All the dyes are made up ahead, work with each child to fold, pleat, etc. their shirt, add rubber bands (I use colored ones as an addition to color code whose shirt is whose, red for one, blue for another, red and blue for a third, etc.), soak for 15-20 min. in soda ash (long enough to play I spy or another art game) then put on color with squeeze bottles. I provide gloves and lend an apron. Each shirt is put in a gallon zipper bag to be taken home and washed several times the next day.
Kids also love designing shirts or pillowcases with the iron-on fabric crayons. Have them draw their design in thin paper, then use the crayons to color & outline on the BACK side of the paper. Teacher does all the ironing as each student finishes. Put old newspapers inside the shirt to keep the color from bleeding.
You can print on fabric with leaves or clean styrofoam meat trays with designs drawn into them with a blunt pencil or ball point pen (again, work backwards).If you use a light colored bandanna to print on, it is already hemmed!
You can also make a loom from a piece of stiff cardboard. Cut slits about a half inch apart on opposite sides to warp it.
Coffee filters and food coloring mixed with water is another idea. Bunch up the round coffee filters into fan shape (little finger in the middle, gather the rest around the edges, twist a pipe cleaner around the pointed center. Dip the filters into a saucer with colored water and you have lovely carnations (idea from the Internet).
Wrap pipe cleaners around pencils
Art classes to 5-12 year olds. Keep it fun. Don't avoid messy. Ask each kid to bring in an old oversized shirt for their smock and have them paint it/decorate it and keep it after the class series end. You might consider going to a thrift shop and buy some extra shirts in case a kid doesn't have one.
My local Arts & Humanities council has two "art academies" every year for the same age group, runs 5-6 consecutive Saturdays. It also provides scholarships for those who can't afford the classes. I donate money for these scholarships. At the conclusion, a showing and a 1? hour reception is held in the lobby of the auditorium. The parents, guardians, or aunts & uncles are asked to bring their artist for punch and cookies to see the childrens' Art. The paintings have been hung on screens and the pottery and other projects are displayed on tables. Lively music is also provided gratis by a local group.Talk to as many artists about their work. Their reaction is interesting because a stranger is taking an interest in them, their artwork and why they made it.
Sculpting is fun, with clay if you can fire it, or sculptey if you need to bake in the oven. The middle school art teacher here teaches some advanced art students (8th grade) stained glass. If these 13/14 yr olds can learn to respect all the danger involved with it, imagine what your kids can do. In some respects, I think kids will step up when they know they need to.I don't think it's out of line for kids to use an iron as long as you explain the dangers involved and supervise. I also think older kids can help younger ones.
They also do an abstract sculpture using heavy wire and attached to a base, then pull pantyhose over it and secure that then coat the whole thing in glue. Let it dry and paint it with acrylics. They go on to write how the piece makes them feel.
Something many have forgotten is how much fun making a picture with yarn and burlap was. Get a few tapestry needles (even plastic ones will work) and let them try embroidering on a big, simple scale.
Use old jars and enamel paint(the bottles have an E on the top) and making candle holders, or put wires on them and hang them in tress for the summer.. or decorate wine glasses for their parents. Go to the thrift stores for the glasses or fancy glass globes.
Take some fat quarters and start the rip for them. Let them finish the rip in 1 inch strips. Knot or gather one end of the strips together around a dowel, and they have a flag or banner they can run through the yard with, letting the fabric streamers float along behind.
Mod Podge fabric shapes onto mat board to create a picture. I taught fabric portraits using that technique in a two-hour class for 6-12 year-olds. With that extra hour, I had time for them to trace key elements of a picture they brought in (and we sized on the copier to fill the 8 x 10 mat), then cut them out, trace around fabric, cut it out arrange, etc They glued down the fabric initially with glue sticks and then we applied 2 coats of mod podge, leaving about 5-10 minutes in between the coats.
You could precut shapes and do a little abstract in just an hour. Use those 1" foam brushes to apply the mod podge. Bring a large supply of fabric, lots of different skin colors and fun prints for clothes. They learned a ton and produced amazing portraits.
Some mat board will bend when it gets wet from the mod podge; as it dries, it lies flat again.
Dip the ends of yarn in stiffener to make "needles" and teach needlepoint on rug canvas. Dip the night before to allow it to dry - or wrap the yarn in wide tape and trim it to make a point.
Simple kumihimo on the foam discs is possible. Braiding floss to make friendship bracelets is popular.
Punched cards or fun felt can make lacing projects possible. The cards could be decorated with paints. The fun felt can be decorated with glued embellishments.
Sun printing is a project that would take an hour but you have to have another project planned for the "waiting" to dry time.
Make a loom out of a flexible limb - tie the two ends together to make a loop or circle. Add limbs and tie them across the loop or circle. You might have to do these ahead of time. Then teach them over and under and around and around to make a sort of earth day dream catcher.
With this age group, you have to be ready for them to invent something completely new and embrace it as alternative art.
Monday, May 3, 2010
Quotes of Steven Wright
If you're not familiar with the work of Steven Wright, he's the famous erudite scientist who once said.... "I woke up one morning, and all of my stuff had been stolen and replaced by exact duplicates". His mind sees things differently than most of us do.Here are some of other gems:
1 - I'd kill for a Nobel Peace Prize.
2 - Borrow money from pessimists -- they don't expect it back.
3 - Half the people you know are below average.
4 - 99% of lawyers give the rest a bad name.
5 - 82.7% of all statistics are made up on the spot.
6 - A conscience is what hurts when all your other parts feel so good.
7 - A clear conscience is usually the sign of a bad memory.
8 - If you want the rainbow, you've got to put up with the rain.
9 - All those who believe in psycho kinesis, raise my hand.
10 - The early bird may get the worm, but the second mouse gets the cheese.
11 - I almost had a psychic girlfriend... but she left me before we met.
12 - OK, so what's the speed of dark?
13 - How do you tell when you're out of invisible ink?
14 - If everything seems to be going well, you have obviously overlooked something.
15 - Depression is merely anger without enthusiasm.
16 - When everything is coming your way, you're in the wrong lane.
17 - Ambition is a poor excuse for not having enough sense to be lazy.
18 - Hard work pays off in the future; laziness pays off now.
19 - I intend to live forever... so far, so good.
20 - If Barbie is so popular, why do you have to buy her friends?
21 - Eagles may soar, but weasels don't get sucked into jet engines.
22 - What happens if you get scared half to death twice?
23 - My mechanic told me, "I couldn't repair your brakes, so I made your horn louder."
24 - Why do psychics have to ask you for your name?
25 - If at first you don't succeed, destroy all evidence that you tried.
26 - A conclusion is the place where you got tired of thinking.
27 - Experience is something you don't get until just after you need it.
28 - The hardness of the butter is proportional to the softness of the bread.
29 - To steal ideas from one person is plagiarism; to steal from many is research.
30 - The problem with the gene pool is that there is no lifeguard.
31 - The sooner you fall behind, the more time you'll have to catch up.
32 - The colder the x-ray table, the more of your body is required to be on it.
33 - Everyone has a photographic memory; some just don't have film.
1 - I'd kill for a Nobel Peace Prize.
2 - Borrow money from pessimists -- they don't expect it back.
3 - Half the people you know are below average.
4 - 99% of lawyers give the rest a bad name.
5 - 82.7% of all statistics are made up on the spot.
6 - A conscience is what hurts when all your other parts feel so good.
7 - A clear conscience is usually the sign of a bad memory.
8 - If you want the rainbow, you've got to put up with the rain.
9 - All those who believe in psycho kinesis, raise my hand.
10 - The early bird may get the worm, but the second mouse gets the cheese.
11 - I almost had a psychic girlfriend... but she left me before we met.
12 - OK, so what's the speed of dark?
13 - How do you tell when you're out of invisible ink?
14 - If everything seems to be going well, you have obviously overlooked something.
15 - Depression is merely anger without enthusiasm.
16 - When everything is coming your way, you're in the wrong lane.
17 - Ambition is a poor excuse for not having enough sense to be lazy.
18 - Hard work pays off in the future; laziness pays off now.
19 - I intend to live forever... so far, so good.
20 - If Barbie is so popular, why do you have to buy her friends?
21 - Eagles may soar, but weasels don't get sucked into jet engines.
22 - What happens if you get scared half to death twice?
23 - My mechanic told me, "I couldn't repair your brakes, so I made your horn louder."
24 - Why do psychics have to ask you for your name?
25 - If at first you don't succeed, destroy all evidence that you tried.
26 - A conclusion is the place where you got tired of thinking.
27 - Experience is something you don't get until just after you need it.
28 - The hardness of the butter is proportional to the softness of the bread.
29 - To steal ideas from one person is plagiarism; to steal from many is research.
30 - The problem with the gene pool is that there is no lifeguard.
31 - The sooner you fall behind, the more time you'll have to catch up.
32 - The colder the x-ray table, the more of your body is required to be on it.
33 - Everyone has a photographic memory; some just don't have film.
Saturday, April 24, 2010
Inspiring art


Loved the colorful textured art at a recent art show. It was created with torn canvas! Another had a mosaic on canvas. And, the tropical scene really spoke to me.
Thursday, April 15, 2010
Drowning in Debt

Drowning in Debt is a quilt I made for an online art quilt group.The Fast Friday challenge theme was Under the Sea. My quilt reflects our economic times. The text, Debt, was cut with the Cursive 101 cartridge.
I designed a life preserver by scanning in a coloring page and I cut fabric with with the Cricut. The white and orange fabrics had Heat n Bond Ultrahold fused to the back and were cut without the paper with the fusible side down on the mat. After I finished, a friend told me that Life's a Beach already a the life preserver image! Oh well...I learnt how to do it myself and am so pleased with Make The Cut and Inkscape software.
Tuesday, April 13, 2010
Miller Woods Spring Nature Walk


Miller Woods is a Beech-Maple Forest, owned by the Plymouth Canton Schools is located on Powell Road and has weekly guided tours in April. We enjoyed the walk and rediscovered wonderful trees and wild flowers including the tiny harbinger of spring, bloodroot, ginger, white trillim and the highlight, the colorful red trillium.
Friday, April 9, 2010
Cyberhints
Cyberhints:
From Terry Grant in Portland www.andsewitgoes.blogspot.com
Liquid Stitch appears to be a fabric glue that is used for hems, etc. Liquid Thread is a liquid fusible. It used to be called Liquifuse, which I think was a more accurate name. I use it for all my fusing. I use it to fuse only the edges of the fabric and I like it because it leaves the fabric softer than most web fusibles and it seals the edges of the fabric much better to prevent fraying. It is applied to the fabric, then you can fuse the fabric with an iron. If used properly it fuses extremely well. I have developed a technique for using the Liquid Thread that works very well for me. I dilute it with water so that it flows better. I find that straight from the bottle it tends to glob and not spread smoothly, but diluting it slightly makes it much more manageable. Tutorial by Terry Grant: http://andsewitgoes.blogspot.com/2006/04/my-fusing-method.html
From Linda Cooper www.LindaCooperQuilts.com
I could skip the teflon sheet part if I added Appli-Glue about one part to three of the liquid thread-water mixture. So what I have is about 2 parts Liquid Thread, 1 part water and 1 part Appli-Glue. Before I added the glue the treated edge seemed to flake and crack off a bit (Terri solves that with her Teflon sheet pressing). So I don't use the glue as glue, only as a bonding agent for the Liquid Fuse.
Cut out my applique to Broderie-Perse on its final outline, turn it over, lay it on junk paper, and outline the edges with the mixture in the fine-tip silk painting bottle. I let it dry (about 15 minutes) and place it where I want it on the finished piece and put a press cloth over and iron in place. When all the appliques are in place I make the quilt sandwich and quilt without having to do any pre-appliqueing. The edges are sealed and only need the final quilting stitches to hold them in place. Add decorative stitching.
"G is for Garden" quilt with this method here: http://www.lindacooperquilts.com/images/GIsForGarden.jpg I painted these flowers with Tsukineko inks and Fabrico markers on white sateen and then cut out the flowers and used the Liquid Thread-glue mixture.
Clean your iron with a piece of wax paper. Sprinkle on some salt ,fold the wax paper over then and run the medium hot iron over it a couple of times
Sheers: Cotton organdy, silk organza, sheer cotton lawn fabric won't shrink like polyester organza. Fusing sheers to misty fuse between two layers of parchment paper (parchment-sheer-misty fuse-parchment-iron). Pretty much any sheer fabric can be ironed, just put a cloth over it. Use a piece of white cotton interlock as pressing cloth, along with low heat.
Free, easy program Posterazor http://posterazor.sourceforge.net/
Enlarge, print designs
http://bonniemccaffery.com/vidcasts/045.html Dubai UAE International Quilt Show
http://www.healingquiltsinmedicine.org/quilt_gallery.htm
http://www.princetonol.com/groups/iad/lessons/middle/middlelessons.html
http://www.suzannesanger.com/Site/Portfolio/Portfolio.html
http://www.joggles.com/panpastel.htm
http://rust-tex.com/TW/
http://www.americanquilter.com/shows_contests/lancaster/2010/quilt_contest/quilt_winners.php?utm_source=delivra&utm_medium=email&utm_campaign=AQS%20On%20Point%20Issue%2020
http://www.flickr.com/photos/arlee/sets/72157623735668618/show/ The Artist's Body exhibit
http://www.flickr.com/photos/arlee/sets/72157606591857048/
From Terry Grant in Portland www.andsewitgoes.blogspot.com
Liquid Stitch appears to be a fabric glue that is used for hems, etc. Liquid Thread is a liquid fusible. It used to be called Liquifuse, which I think was a more accurate name. I use it for all my fusing. I use it to fuse only the edges of the fabric and I like it because it leaves the fabric softer than most web fusibles and it seals the edges of the fabric much better to prevent fraying. It is applied to the fabric, then you can fuse the fabric with an iron. If used properly it fuses extremely well. I have developed a technique for using the Liquid Thread that works very well for me. I dilute it with water so that it flows better. I find that straight from the bottle it tends to glob and not spread smoothly, but diluting it slightly makes it much more manageable. Tutorial by Terry Grant: http://andsewitgoes.blogspot.com/2006/04/my-fusing-method.html
From Linda Cooper www.LindaCooperQuilts.com
I could skip the teflon sheet part if I added Appli-Glue about one part to three of the liquid thread-water mixture. So what I have is about 2 parts Liquid Thread, 1 part water and 1 part Appli-Glue. Before I added the glue the treated edge seemed to flake and crack off a bit (Terri solves that with her Teflon sheet pressing). So I don't use the glue as glue, only as a bonding agent for the Liquid Fuse.
Cut out my applique to Broderie-Perse on its final outline, turn it over, lay it on junk paper, and outline the edges with the mixture in the fine-tip silk painting bottle. I let it dry (about 15 minutes) and place it where I want it on the finished piece and put a press cloth over and iron in place. When all the appliques are in place I make the quilt sandwich and quilt without having to do any pre-appliqueing. The edges are sealed and only need the final quilting stitches to hold them in place. Add decorative stitching.
"G is for Garden" quilt with this method here: http://www.lindacooperquilts.com/images/GIsForGarden.jpg I painted these flowers with Tsukineko inks and Fabrico markers on white sateen and then cut out the flowers and used the Liquid Thread-glue mixture.
Clean your iron with a piece of wax paper. Sprinkle on some salt ,fold the wax paper over then and run the medium hot iron over it a couple of times
Sheers: Cotton organdy, silk organza, sheer cotton lawn fabric won't shrink like polyester organza. Fusing sheers to misty fuse between two layers of parchment paper (parchment-sheer-misty fuse-parchment-iron). Pretty much any sheer fabric can be ironed, just put a cloth over it. Use a piece of white cotton interlock as pressing cloth, along with low heat.
Free, easy program Posterazor http://posterazor.sourceforge.net/
Enlarge, print designs
http://bonniemccaffery.com/vidcasts/045.html Dubai UAE International Quilt Show
http://www.healingquiltsinmedicine.org/quilt_gallery.htm
http://www.princetonol.com/groups/iad/lessons/middle/middlelessons.html
http://www.suzannesanger.com/Site/Portfolio/Portfolio.html
http://www.joggles.com/panpastel.htm
http://rust-tex.com/TW/
http://www.americanquilter.com/shows_contests/lancaster/2010/quilt_contest/quilt_winners.php?utm_source=delivra&utm_medium=email&utm_campaign=AQS%20On%20Point%20Issue%2020
http://www.flickr.com/photos/arlee/sets/72157623735668618/show/ The Artist's Body exhibit
http://www.flickr.com/photos/arlee/sets/72157606591857048/
Sunday, April 4, 2010

Friday, April 2, 2010
Celebrating The Model T Era

Celebrating The Model T Era was the final quilt in a series of my Decade Quilts of the Twentieth century. 38”h x 31”w
The Assembly line revolutionized the 1910s...Developments of that period included stop signs, traffic signals, drivers license, maps, Artificial kidneys, bras, 35mm camera, crossword, Hollywood, iodine, Kotex, lipstick, mixers, refrigerators, Taxi service are among others included in the quilt.
Materials:
buttons, beads, charms, jewelry, piping, trims, vinyl, windowscreen, sheers, net, doorhinge, washers, lockwashers
Pothole Patchwork

16"w x 24"h
Alternate route advised
Barrels
Cones
Detour
Expect Delays
Frustration Ahead
Gridlock
Humor
Incubating bright ideas (lightbulb spool)
Jackhammer (needle on sewing machine)
Kindness
Longterm relief
Men at work
No Kidding!
Potholes patchwork
Questions..when will it end????
Road rage
Stop
Taxi
Ultimate Parking Lot
Vanity plate: caution
Windshield cracks walk winter
X : Don’t tailgate
Yield
Zoom
The skeleton: the End of construction ! :)
1000 Artisan Textiles

I am so excited that 2 of my quilts, are being published in the soon to be released book, 1000 Artisan Textiles by Sandra Salamony & Gina M. Brown
0823 Celebrating The Model T Era, 38” x 31” (96.5 cm x 78.5 cm): hardware (door hinge, washers, lock washers), appliqué
0824 detail of Celebrating The Model T Era
0825 Pothole Patchwork, 16” x 24” (40.5 cm x 61 cm): stitching with metal soda cans, paper cord sewing machine needle, other mixed media
I originally did Pothole Patchwork for an Adventurous Quilter's Challenge to use the color orange...and thus the construction theme.
The Model T Era was the final quilt in a series of my Decade Quilts of the Twentieth century.
The book is in the warehouse and I cannot wait to see my babies in print!
Monday, March 15, 2010
Cricut, fabric and quilts

Costa Rican Rainforest
I combined several challenges for this quilt including the Fast Friday challenge and the Michigan Invitational. I also challenged myself to create a quilt where the majority of the shapes were cut with the Cricut Expression. The only fusible interfacing that worked for cutting fabric was Heat n Bond Ultrahold. I was so impressed with how well this machine cut the intricate details in fabric.
Also used: Tyvek, beads, cheescloth, lame, net, shelfliner, trims, recycled blouse.
Sunday, March 14, 2010
Operation Quiet Comfort Quilt


This quilt is made for wounded soldiers following their guidelines.
I used the Serenity Prayer fabric on the back.
Thursday, March 11, 2010
Cyberhints
Cover a stretched canvas with hand dyed fabric that is stapled to the back of the canvas. Hand sew along the top and bottom of the completed quilt onto the hand dyed fabric. Then, center the quilt over the canvas and staple the hand dyed onto the stretcher frame on the back. Attach small screw eyes on the back and attach the hanging wire
The sander can replace most of the felting by hand process on the kitchen counter. Cover it with about 3 layers of towels for counter protection, then begin a wet felting project. Work on it until the fibers (and design) have begun to felt and don't easily pull apart. Then use the sander on top of your plastic sheet. You don't need to use any pressure. The pressure of the weight of the sander is enough.
Fabric dyeing in the microwave. Use a separate microwave for dyeing
- Presoak the fabric in soda ash solution (approx. 20-30 minutes)
- Place fabric in a microwaveable container (like Pyrex pie plates)
- Pour the dye solution on the fabric, blending colors as you like
- Mush the fabric around a little or a lot to move the dye around - the more you mush, the less white shows
- Slide the pie plate into a gallon size ziploc bag and seal
- Put the bagged pie plate into the microwave and nuke for 2 minutes
- Take the plate out and let it rest for about 10 minutes - do not open the bag
- Put the plate back into the microwave and nuke for 2 more minutes
- Take the plate out and VERY CAREFULLY open the ziploc bag to release the steam
- Allow fabric to cool down to room temperature
- Rinse and wash as usual
In a pie plate, you can do a yard of cotton, about 3 yards of silk, hanks of yarn, socks, etc.
Use your refrigerator freezer to almost the same effect as snow dying. Batch fabric in the freezer, freeze it first then put it in the dye. It produces variations on that stark spiky icy patterns. Freeze the fabric first (wet it, then put it in the freezer, then put it directly in the dye bath.
The sander can replace most of the felting by hand process on the kitchen counter. Cover it with about 3 layers of towels for counter protection, then begin a wet felting project. Work on it until the fibers (and design) have begun to felt and don't easily pull apart. Then use the sander on top of your plastic sheet. You don't need to use any pressure. The pressure of the weight of the sander is enough.
Print mirror image in WORD. Click on PRINT, then on PROPERTIES. Click on the Advanced, and check the box Mirror Image, then print.
no sticky residue or stiffness spray sealent for inkjet printed textiles is called PYMII (Preserve Your Memories II)
from http://www.precision-blue.com/
Embossing, texturing and coloring bamboo batting:
http://ingoodcompanytarts.blogspot.com/2010/02/february-tart-lesson-embossing-bamboo.html
http://www.quiltshops.com/search.htm
http://elsiemcampbell.com/BOM.html
http://www.threadsmagazine.com/item/3833/video-manuels-free-motion-embroidery-technique incredible!
http://www.ericas.com/sewing/patterns/totes2.htm http://alturl.com/ny3b the Snap HAPPIER Purse insert
http://www.internationalfibercollaborative.com/index.html Dream Rocket team has 2 shows coming up. We are having 13 and counting shows around the country to display your panels before they are assembled together and wrap the Saturn V Rocket! You can be a part of the Dream Rocket Saturn V Rocket Wrap and the Dream Rocket Tour Express for only $25! To be included in these shows your reservation &panel submission needs to be completed by April1…images of submitted panels http://www.flickr.com/photos/thedreamrocket
I participated in the leaf project last year and it was great!
http://www.internationalfibercollaborative.com/html/treeproject.html
http://www.quiltpoetry.com/hints-01.html
http://www.quiltcetera.com/ Click on Tutorials on the left side, three patterns, including a tiny origami purse that could be made larger.
http://www.youtube.com/watch?v=8JWRtsyoLhQ&feature=channel
http://www.quilterbydesign.com/lessons2.html
companies that offer the service of printing yardage of your fabric design:
http://creativityjourney.blogspot.com/2010/02/update-print-your-own-fabric-companies.html
http://www.designersplacenw.com/ezine/TextileArtsQuarterly_Issue1_feb2010.pdf
http://almaart.com/Portfolio.html
http://www.andrusgardensquilts.com/blog/what-to-do-with-a-mini-art-quilt
http://www.laurieswim.com/Quilt%20Gallery/
http://fiberfocus.blogspot.com/2008/11/how-to-machine-quilt-large-bed-quilt-on.html
The sander can replace most of the felting by hand process on the kitchen counter. Cover it with about 3 layers of towels for counter protection, then begin a wet felting project. Work on it until the fibers (and design) have begun to felt and don't easily pull apart. Then use the sander on top of your plastic sheet. You don't need to use any pressure. The pressure of the weight of the sander is enough.
Fabric dyeing in the microwave. Use a separate microwave for dyeing
- Presoak the fabric in soda ash solution (approx. 20-30 minutes)
- Place fabric in a microwaveable container (like Pyrex pie plates)
- Pour the dye solution on the fabric, blending colors as you like
- Mush the fabric around a little or a lot to move the dye around - the more you mush, the less white shows
- Slide the pie plate into a gallon size ziploc bag and seal
- Put the bagged pie plate into the microwave and nuke for 2 minutes
- Take the plate out and let it rest for about 10 minutes - do not open the bag
- Put the plate back into the microwave and nuke for 2 more minutes
- Take the plate out and VERY CAREFULLY open the ziploc bag to release the steam
- Allow fabric to cool down to room temperature
- Rinse and wash as usual
In a pie plate, you can do a yard of cotton, about 3 yards of silk, hanks of yarn, socks, etc.
Use your refrigerator freezer to almost the same effect as snow dying. Batch fabric in the freezer, freeze it first then put it in the dye. It produces variations on that stark spiky icy patterns. Freeze the fabric first (wet it, then put it in the freezer, then put it directly in the dye bath.
The sander can replace most of the felting by hand process on the kitchen counter. Cover it with about 3 layers of towels for counter protection, then begin a wet felting project. Work on it until the fibers (and design) have begun to felt and don't easily pull apart. Then use the sander on top of your plastic sheet. You don't need to use any pressure. The pressure of the weight of the sander is enough.
Print mirror image in WORD. Click on PRINT, then on PROPERTIES. Click on the Advanced, and check the box Mirror Image, then print.
no sticky residue or stiffness spray sealent for inkjet printed textiles is called PYMII (Preserve Your Memories II)
from http://www.precision-blue.com/
Embossing, texturing and coloring bamboo batting:
http://ingoodcompanytarts.blogspot.com/2010/02/february-tart-lesson-embossing-bamboo.html
http://www.quiltshops.com/search.htm
http://elsiemcampbell.com/BOM.html
http://www.threadsmagazine.com/item/3833/video-manuels-free-motion-embroidery-technique incredible!
http://www.ericas.com/sewing/patterns/totes2.htm http://alturl.com/ny3b the Snap HAPPIER Purse insert
http://www.internationalfibercollaborative.com/index.html Dream Rocket team has 2 shows coming up. We are having 13 and counting shows around the country to display your panels before they are assembled together and wrap the Saturn V Rocket! You can be a part of the Dream Rocket Saturn V Rocket Wrap and the Dream Rocket Tour Express for only $25! To be included in these shows your reservation &panel submission needs to be completed by April1…images of submitted panels http://www.flickr.com/photos/thedreamrocket
I participated in the leaf project last year and it was great!
http://www.internationalfibercollaborative.com/html/treeproject.html
http://www.quiltpoetry.com/hints-01.html
http://www.quiltcetera.com/ Click on Tutorials on the left side, three patterns, including a tiny origami purse that could be made larger.
http://www.youtube.com/watch?v=8JWRtsyoLhQ&feature=channel
http://www.quilterbydesign.com/lessons2.html
companies that offer the service of printing yardage of your fabric design:
http://creativityjourney.blogspot.com/2010/02/update-print-your-own-fabric-companies.html
http://www.designersplacenw.com/ezine/TextileArtsQuarterly_Issue1_feb2010.pdf
http://almaart.com/Portfolio.html
http://www.andrusgardensquilts.com/blog/what-to-do-with-a-mini-art-quilt
http://www.laurieswim.com/Quilt%20Gallery/
http://fiberfocus.blogspot.com/2008/11/how-to-machine-quilt-large-bed-quilt-on.html
Thursday, February 18, 2010

Cricut fun at the AQ retreat


The Adventurous Quilters enjoyed a weekend of sewing at the Columbiere retreat in Clarkston.
I used the time to play with the Cricut and cut out many designs and learned of the many shapes it can cut instantly. It calculates how many to cut out in a variety of sizes needed and cut some very intricut designs.So now I have many "appliques" cut out for the Michigan Invitaional cahllenge, my next project. I can also see many possiblities for text in future quilt projects.
Subscribe to:
Posts (Atom)